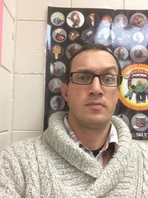
In this assignment you will be creating a text portrait in photoshop. The big goal of the project is to get you more time on photoshop and in the long run making you more comfortable and familiar with some of the amazing things you can do with it.
Step 1
You are going to need to get a photo of yourself or someone else that you will turn into a text portrait. Use a large enough image/file that your image will not become pixelated when viewed at higher resolutions. Also to make your life easier when you are taking the picture try to have the background be a solid color as well as a contrasting color to your subject. SEE BELOW.
Step 2
This is called a text portrait. In step one we choose a picture now you need the text! This is letter ally going to be written all over your face so you need to be intentional and thoughtful with the text selected. Wheat is something meaningful or symbolic to the person chosen? Music lyrics? Passages from a book? A speech? A poem? All of the above? If you look at the example provided you will see that there is a lot of text needed. It is ok to use words or text more than once because some will get lost in the jumble. Remember that it should be meaningful and school appropriate!
Step 3
Next you are going to need to throw your image into photoshop and start getting rid of the background. Watch the video below!
Step 4
Duplicate the layer and go to Image>Adjustment>Desaturate. You will have a black and white photo. Add a white background, by creating a new layer, selecting the paint bucket tool and filling the blank layer in white. You may have to rearrange layers. After that save the file, it has to be PSD otherwise it won't work with the Displace filter.
Step 5
With the Horizontal Type Tool (T) create text boxes and start adding texts. The idea is to play with the texts, they don't have to be readable, or at least with normal legibility, so play with the line-heights, reduce that so the lines overlay one another.
Also make some keywords much bigger and bold, like in my case I highlight some words like Photoshop Tutorials, Illustrator, Inspiration... Also, play with italic, regular texts as well as alignments and text sizes. Tip: I used Garamond for the font, I personally think serif fonts look much better for this effect.
Also make some keywords much bigger and bold, like in my case I highlight some words like Photoshop Tutorials, Illustrator, Inspiration... Also, play with italic, regular texts as well as alignments and text sizes. Tip: I used Garamond for the font, I personally think serif fonts look much better for this effect.


