COLOR CORRECTION
This lesson is taken from www.photoshoptrainingchannel.com - This is a great resource for all things photoshop. Jesús Ramirez, covers everything from recreating movie posters to technical aspects of masking and surrealist color manipulation.
In this tutorial we’ll talk about my “go-to tool” for color correction, the Curves Adjustment layer. This is one of my favorite adjustments and I use it instead of widely used Color Balance Adjustment for color correction.
In this video we’ll also take the time to talk about how color works in computer monitors and in Photoshop. This is a complicated topic but I’ll try to simplify it so it’s easy to understand. Once you have the concepts of RGB and the color wheel, you’ll be able to color correct your images with more ease.
I’ll end the tutorial by showing you how you can use Curves to color match an image to create a realistic composition. This is the image of the jet on the photo cover for this tutorial.
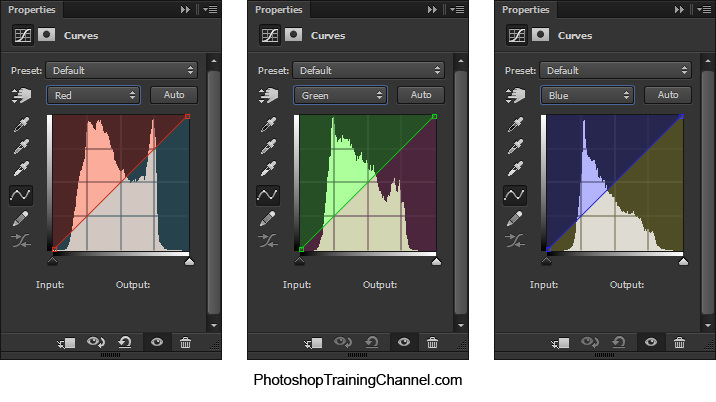
Also, I’ve create this image to help you better understand how curves work. The image represents what would happen when you drag a point up or down, in any given channel.
In this tutorial we’ll talk about my “go-to tool” for color correction, the Curves Adjustment layer. This is one of my favorite adjustments and I use it instead of widely used Color Balance Adjustment for color correction.
In this video we’ll also take the time to talk about how color works in computer monitors and in Photoshop. This is a complicated topic but I’ll try to simplify it so it’s easy to understand. Once you have the concepts of RGB and the color wheel, you’ll be able to color correct your images with more ease.
I’ll end the tutorial by showing you how you can use Curves to color match an image to create a realistic composition. This is the image of the jet on the photo cover for this tutorial.
Also, I’ve create this image to help you better understand how curves work. The image represents what would happen when you drag a point up or down, in any given channel.
DOWNLOAD THESE FILES -> |
| ||
PHOTO RESTORATION
|
Start by downloading this file ------>>>>> |
| ||
Your memories are important, and deserve to be displayed as best they can. Many people find older photos in boxes, albums, shoes, and they are torn, or folded. These things happen, don’t feel bad, just learn how to repair the damage.
In Part 1 we are covering how to repair the border of the photo, and some great ways to blend layers together.
In Part 1 we are covering how to repair the border of the photo, and some great ways to blend layers together.
